 how-to
Electrical Panel Upgrade Inspection Checklist
Last Updated: November 2, 2026
Quick Summary
A panel upgrade inspection covers safety and de-energizing, enclosure and meter condition, breaker sizing and load calculations, then wiring, grounding, and labeling. The process runs from permit and plan review through utility disconnect, rough inspection, final inspection, and utility reconnect. Scheduling the rough inspection before grounding and bonding are complete is a common cause of a failed first visit.
- Inspectors check that the panel is de-energized and the working space in front of it is clear.
- A breaker that does not match its wire size fails inspection, as does missing AFCI or GFCI protection where required.
- The rough inspection happens with the enclosure open, before the cover and dead front go on.
- The final inspection checks labeling, clearances, and finished workmanship after the circuit directory is filled out.
- Correct a deficiency, document it with a photo, and schedule the re-inspection.
Table of Contents
- What Inspectors Check During a Panel Upgrade
- Your Electrical Panel Upgrade Permit and Inspection Timeline
- The Electrical Panel Installation Checklist for a Clean Rough-In
- Using an Electrical Panel Upgrade Inspection Checklist PDF on Site
- When an Inspection Fails: Deficiency Severity and What Happens Next
- How Local Rules Change the Checklist From One Jurisdiction to the Next
- Preparing Your Home and Paperwork Before the Inspector Arrives
- Schedule Your Panel Upgrade With a Licensed Electrician
- Frequently Asked Questions
What Inspectors Check During a Panel Upgrade
An electrical panel upgrade inspection checklist is the fastest way to catch problems before an inspector does. The failures inspectors see rarely come from bad intentions.
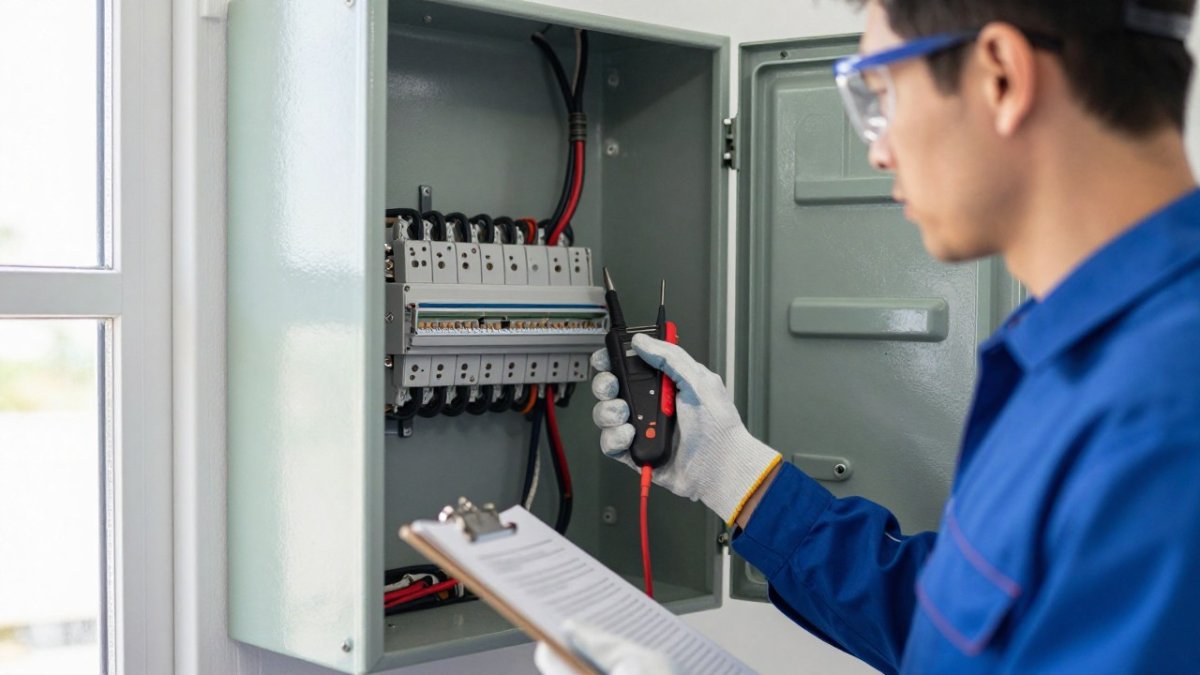
Most failed inspections trace back to small, fixable items. A missing label. A loose neutral. A breaker sized wrong for the wire.
Below, we break down what inspectors actually look for, in the order they look for it.
Pre-Inspection Safety and De-Energizing
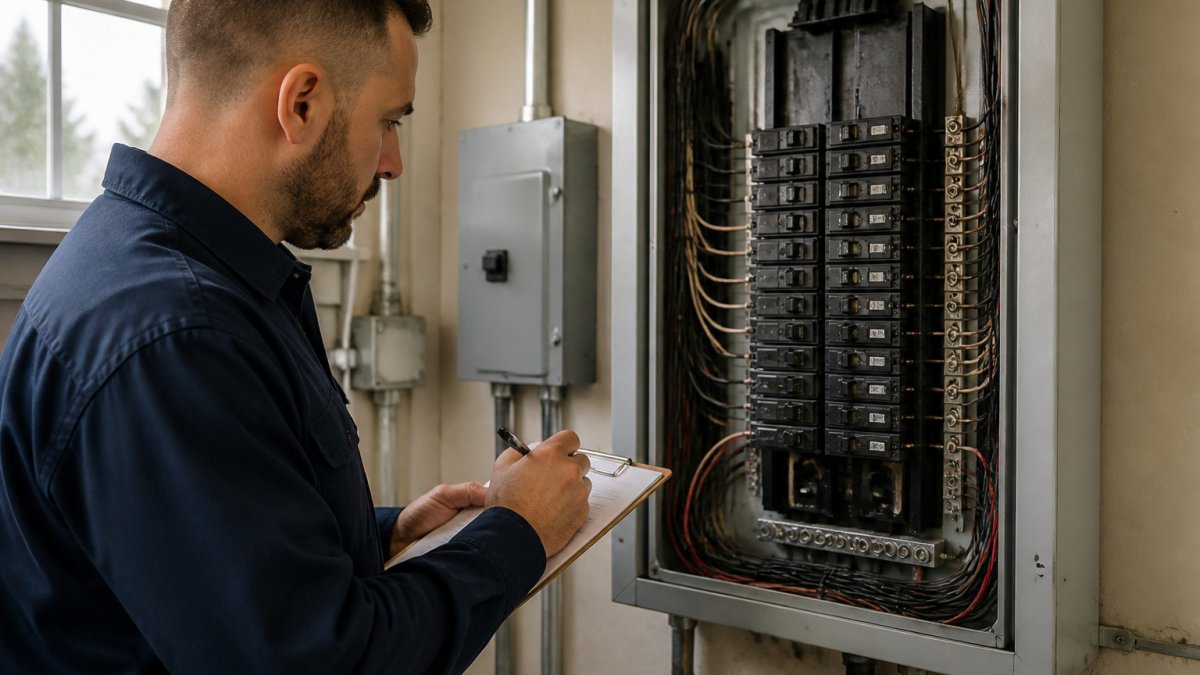
The first thing an inspector checks is whether the panel is safe to approach.
Inspectors also look for working clearance. The National Electrical Code requires a clear working space in front of the panel (Electrical Room Basics Part 1).
Watch out: leaving the panel energized during rough inspection is a common mistake. It puts the inspector at risk and can halt the inspection on the spot.
Enclosure, Meter, and Service Equipment Condition
Physical condition matters as much as wiring. Inspectors check the panel enclosure for rust, dents, missing knockouts, and gaps that let moisture or debris inside.
The meter and service entrance equipment get the same scrutiny. Corrosion on the meter base, damaged conduit, or a loose service mast all get flagged.
A quick pass with a flashlight before the inspector arrives saves everyone time.
Capacity, Breaker Sizing, and Load Calculations
This is where most upgrades succeed or fail. Inspectors verify that the panel's amperage matches the service capacity and that every breaker is sized correctly for its wire.
A load calculation shows whether the service can handle the home's demand. Inspectors do not always run one, but they will check that the panel's rating matches the service.
Overcurrent protection is checked breaker by breaker, and a breaker that does not match its wire size fails.
Wiring, Terminals, Grounding, and Labeling
Connection tightness is the quiet killer. Loose terminal connections cause overheating, scorching, and arcing over time. Inspectors tug, look for discoloration, and check torque where they can.
Grounding and bonding get close attention. The grounding electrode, neutral conductor, and bonding jumpers must all be correct and secure.
Then there is the circuit directory. Every breaker needs a clear label. An unlabeled panel reads as sloppy work, and inspectors notice.
Your Electrical Panel Upgrade Permit and Inspection Timeline
A panel upgrade follows a predictable path, and knowing it keeps your project on schedule.
- Permit application and plan review. You or your electrician submits a permit application, a load calculation, and a scope of work to the local building department. Plan review timing depends on the local building department. The permit card and approved plans are what the inspector will check against later.
- Utility disconnect and service release. Before the old panel can be removed, the utility has to disconnect the service drop or lateral. Utility disconnect procedures differ, so confirm the process with the utility before the crew arrives. Confirm the utility's process before the crew shows up, because a missed disconnect appointment can idle a crew for a day.
- Rough inspection. Scheduled after the new panel is mounted, conduit and conductors are run, grounding and bonding are complete, and the enclosure is open, but before the cover and dead front go on. The inspector wants to see terminations, breaker sizing, conductor routing, and the grounding electrode conductor while everything is exposed.
- Final inspection. Scheduled after the panel is fully installed, the dead front and cover are on, the circuit directory is filled out, and all cover plates are in place. This is where labeling, clearances, and finished workmanship get checked.
- Utility reconnect and meter re-seal. The utility reconnects service and re-seals the meter only after the authority having jurisdiction signs off. Some utilities want a copy of the approved inspection before they will reconnect; others coordinate directly with the inspector.
Timelines vary widely. Timelines vary widely by jurisdiction and utility scheduling, and a backlog or limited disconnect slots can extend them.
Watch out: scheduling the rough inspection before grounding and bonding are complete is one of the most common causes of a failed first visit, because those items cannot be verified once the cover is on.
If your project also involves a generator or backup system, the permit and inspection sequence gets more involved, with separate electrical and mechanical reviews and sometimes a gas permit. Our step-by-step guide to residential generator permits in Tennessee walks through that process.
Here is the sequence most residential panel upgrades follow, from permit to reconnect.
| Stage | When it happens | What the inspector checks |
|---|---|---|
| Permit application and plan review | Before any work begins | Permit card and approved plans |
| Utility disconnect and service release | Before the old panel is removed | Confirm utility process beforehand |
| Rough inspection | Panel mounted, wiring run, enclosure open | Terminations, breaker sizing, grounding, conductor routing |
| Final inspection | Panel fully installed, cover and directory on | Labeling, clearances, finished workmanship |
| Utility reconnect and meter re-seal | After the authority having jurisdiction signs off | Some utilities want approved inspection copy |
The Electrical Panel Installation Checklist for a Clean Rough-In
A clean rough-in makes the final inspection almost automatic. Here is the checklist we run on every job:
- Panel mounted at correct height with proper working clearance
- Conduit secured and properly supported
- Conductors stripped to correct length, no nicked strands
- Neutral and ground bars separated where required
- Terminal connections torqued to spec
- Grounding electrode conductor run and bonded
- Breakers sized to match wire gauge
- AFCI and GFCI protection installed where required
- Circuit directory filled out and legible
Run this list before you call for rough inspection, not after.
Take our 60-second quiz for a free quote today! →
Using an Electrical Panel Upgrade Inspection Checklist PDF on Site
A printed checklist beats memory every time. Crews who work from a PDF on a tablet or clipboard catch more than crews working from habit.
What belongs in a good checklist PDF:
- Safety and de-energizing steps
- Enclosure and meter condition items
- Breaker sizing and load calculation notes
- Grounding and bonding verification
- Labeling and directory checks
- A sign-off line for the lead electrician
Keep the PDF short enough to finish in one pass. A 40-page document gets skipped. A one-page checklist gets used.
When an Inspection Fails: Deficiency Severity and What Happens Next
Not every deficiency is equal.
Serious deficiencies include exposed conductors, missing grounding, and improper breaker sizing. These stop the project until corrected.
Minor items, like a missing label or a loose cover screw, often get a correction notice with a short window to fix.
The fix is straightforward. Correct the item, document it with a photo, and schedule the re-inspection.
How Local Rules Change the Checklist From One Jurisdiction to the Next
Code adoption varies by city and county, and that variation is where most out-of-town checklists fall apart.
That means your checklist has to flex.
Before you schedule anything, confirm these items with the local building department and the utility:
- Which code edition is enforced, and whether the jurisdiction publishes local amendments. Many departments post their adopted edition and amendment list on the city or county website; if not, ask the permit counter directly.
- What the inspection stages are and how they are scheduled. Some departments combine rough and final into a single visit for small residential work; others require a separate underground, rough, and final. Ask whether the rough inspection must be requested before the panel cover goes on.
- Whether the utility requires separate coordination for disconnect and reconnect, including lead times, who is authorized to pull the meter, and whether the utility needs a copy of the approved inspection before reconnection.
- What the permit card and posting requirements are, since some jurisdictions require the card visible at the service entrance and others accept it on the panel door.
- Whether a load calculation must be submitted with the permit or only made available on site, because that changes what paperwork you prepare before the first visit.
A five-minute call to the permit counter prevents a two-week delay.
Watch out: relying on a neighboring jurisdiction's checklist is a common shortcut that backfires when the local amendment list differs, so verify the adopted edition for the specific address before the crew mobilizes.
Preparing Your Home and Paperwork Before the Inspector Arrives
The inspector is checking your home as much as your panel. Clear access to the panel, remove stored items from the working space, and make sure the panel area is well lit.
Have the paperwork ready:
- The permit card, posted where required
- The approved plans or load calculation
- The circuit directory, filled out
- Any product listings or manufacturer documentation
If you are not sure your panel actually needs the upgrade yet, our guide to the 5 signs your home electrical panel needs an upgrade helps you confirm the warning signs before you commit to an inspection.
Schedule Your Panel Upgrade With a Licensed Electrician
Panel work is not a DIY job. Permits, load calculations, grounding, and inspection coordination all require a licensed electrician who knows the local process.
Before you hire anyone, verify their license and insurance. Our guide on how to verify a licensed electrician shows exactly what to check.
At Generators of Nashville by Evolution Electric, our licensed electricians have handled panel upgrades and backup power installations across Middle Tennessee since 2014.
Get backup generators in Nashville and see the full range of electrical and backup power services we offer. Then take our 60-second quiz for a free, personalized quote.
Frequently Asked Questions
What do inspectors look for in a panel upgrade?
Inspectors verify the enclosure is undamaged and properly mounted, the service amperage matches the permit, breakers are correctly sized for their circuits, and all terminals are tight. They check grounding and bonding, neutral and ground separation in a main panel, working clearance in front of the panel, and a completed circuit directory. They also confirm AFCI and GFCI protection where the electrical code requires it. Missing labels and loose connections are among the most common reasons a panel upgrade inspection fails.
Do I need an inspection after upgrading an electrical panel?
Yes. Panel replacement is generally permitted work, and the permit typically triggers inspection. Most areas require a rough-in inspection before the panel is closed up and a final inspection before the utility restores or confirms service. Skipping inspection can leave you with an unpermitted installation that complicates insurance claims and home sales. Your licensed electrician should schedule both stages and coordinate with the utility for reconnection.
What happens if an electrical panel upgrade fails inspection?
The inspector issues a correction notice listing each deficiency. Minor items, such as missing labels or an incomplete circuit directory, can often be fixed and re-inspected quickly. Serious findings, like undersized conductors, improper grounding, or missing overcurrent protection, require real rework before the panel can pass. Your electrician corrects the items, schedules a re-inspection, and the utility holds service reconnection until the final approval is issued. Budget extra time for a failed inspection.
What should I check before an electrical panel upgrade?
Clear the working space in front of the panel and remove stored items from the surrounding area. Confirm the permit is posted and the approved plans are on site. Gather the panel labeling information and any documentation your electrician provided. Confirm the utility coordination date for service disconnection and reconnection. Finally, verify the electrical panel installation checklist has been reviewed against the approved drawings so the rough-in matches what the inspector will compare it to.
A failed inspection costs you time, money, and another wait for the inspector's calendar. The right electrician removes that risk before the first wire is pulled. Get started with Generators of Nashville by Evolution Electric and schedule a panel upgrade that passes inspection the first time.